BoxWrap2d Tutorials
Back to tutorial index
Part Two: Making Shapes
Because you've gotta have Stuff!
Let's jump right in - I'll assume you already installed the BoxWrap2d library in Part 1. First off, here's the whole world creation bit for this example at once. The differences from the previous tutorial's code are highlighted.
import org.jbox2d.dynamics.contacts.*;
import org.jbox2d.p5.*;
import org.jbox2d.dynamics.*;
import org.jbox2d.common.*;
import org.jbox2d.collision.*;
import org.jbox2d.dynamics.joints.*;

Physics physics;

void setup() {
  size(640,480,P3D); // Let's go with P3D from now on for greater speed
  frameRate(60);
  initScene();
}


void initScene() {

  float gravX = 0.0;
  float gravY = -10.0;
  float AABBWidth = 2*width;
  float AABBHeight = 2*height;
  float borderBoxWidth = width;
  float borderBoxHeight = height;
  float pixelsPerMeter = 30;
  physics = new Physics(this, width, height,
		              gravX, gravY,
			      AABBWidth, AABBHeight,
			      borderBoxWidth, borderBoxHeight,
			      pixelsPerMeter);
  physics.setDensity(1.0f);
}
The main difference so far is that we're now using a more detailed Physics() constructor, mainly because we want to set a different scale factor for the world-to-screen conversions (30 instead of the default 10). Let's go through the other options in more detail, though:
- gravX/gravY: the x and y components of gravity. These are given in meters/sec^2 (this is one of the few places where you do not use pixel units). gravY = -10.0 is a reasonable setting, close to the real world value, and JBox2d is well tuned so that you shouldn't have any problems using that value. We'll see some more interesting things you can do with gravity in a later tutorial.
- AABBWidth/ABBHeight: the size of the axis-aligned bounding box (AABB) of your physical world, in pixels. Should anything move outside this range, it will be frozen, and considered "off the playing field." Generally speaking, you shouldn't need to worry about this because of the...
- borderBoxWidth/borderBoxHeight: the width/height of the solid border, in pixels. BoxWrap2d always adds a solid border to "frame" your physics, and it should be smaller than the world AABB specified above. Note: the border may be removed by calling physics.removeBorder() if you really don't want it.
- pixelsPerMeter: it's all in the name. By default this is set to 10, which means 10 pixels == 1 meter. JBox2d is tuned to optimally simulate objects between around .1 meters to 10 meters in size, so plan accordingly when picking this value. An appropriate choice of scale will allow you to leave your gravity set at around 10 m/s^2 rather than turning it way up as would be necessary with a 1 pixel per meter setting.
Which leaves us with the draw loop, where we'll create different objects at the mouse position based on the key pressed. Important stuff is highlighted, again.
void draw() {
  background(0);

  if (keyPressed) {
    if (key == '1') {
      physics.createCircle(mouseX, mouseY, random(5,10));
    }
The createCircle(x, y, radius) method creates a circle centered at (x, y) with a given radius, with coordinates and radius given in pixels (all values are in pixels in BoxWrap2d unless you call methods from objects that are in JBox2d - the rule here is that if you call a method from a Physics object using this library, you're usually safe to assume that you may use pixels). It returns a Body object (which is one of the aforementioned JBox2d objects, so for instance calling someBody.applyForce(myForce,myPoint) would require myForce and myPoint to be vectors given in meter units, not pixels - to use pixels, you would want to call physics.applyForce(someBody, myForce, myPoint) to do the same thing).
    else if (key == '2') {
      float sz = random(5,10);
      physics.createRect(mouseX - sz, mouseY - sz, mouseX + sz, mouseY + sz);
    }
createRect(x0,y0,x1,y1) functions much like Processing's rect() function when using the CORNERS mode, in that it takes two opposite corners (it doesn't matter which order they are specified in, for instance there is no requirement that x0 < x1) and creates a rectangular Body from them. There are no equivalents to Processing's CORNER, RADIUS, or CENTER modes in BoxWrap2d.
    else if (key == '3') {
      float sz = random(10,20);
      physics.createPolygon(mouseX,      mouseY,
                            mouseX+sz,   mouseY,
                            mouseX+sz*.5,mouseY-sz);
    }
createPolygon(...) takes a list of x,y coordinates and creates a polygon out of them. There are a few restrictions on polygons in any Box2d based engine (some of these restrictions may be loosened in future versions). They must be:
- Convex and without near-parallel neighboring sides
- 8 or fewer vertices
- Given in counterclockwise order (as viewed on the screen)
- There are some obscure requirements on minimum size - keep your stuff fatter than .1 m and you should always be fine.
    else if (key == '4') {
      int nVerts = floor(random(4,8));
      float rad = random(5,10);
      float[] vertices = new float[nVerts*2];
      for (int i=0; i < nVerts; ++i) {
        vertices[2*i] = mouseX + rad*sin(TWO_PI*i/nVerts);
        vertices[2*i+1] = mouseY + rad*cos(TWO_PI*i/nVerts);
      }
      physics.createPolygon(vertices);
    }
As you can see, you may also pass an array to createPolygon().
    else {
      //Reset everything
      physics.destroy();
      initScene();
    }
  }
}
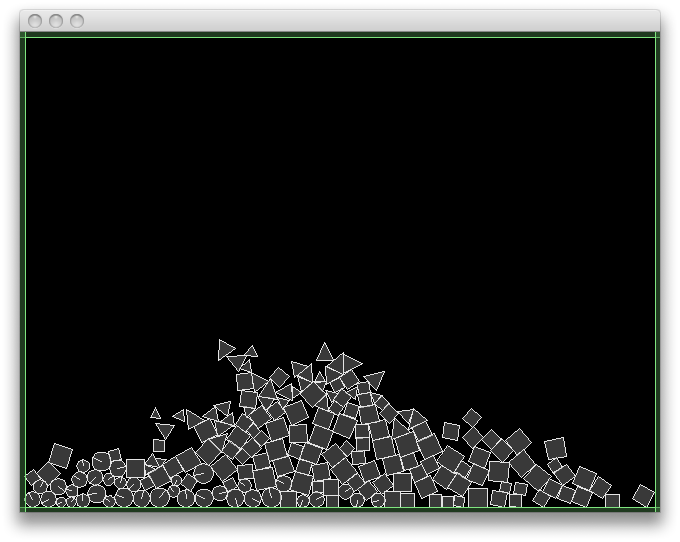
And we're done! Fire up the example, press 1-4 to spray objects, and press any other key to reset the scene.
Back to tutorial index